

Autoprovisioning RoutIT
How to set up Autoprovisioning for RoutIT
Autoprovisioning for RoutIT
Before you begin you should have the following information available:
- Login details for the Gigaset redirect-server.
- For an account of the Redirect-server you have to apply for it via your point of sale e.g. a Distributor.
- MAC-address and MAC-ID of the Gigaset device.
- Redirect URL
- This is the provisioning URL
- Acces to the RoutIT portal
- The device to provision should be able to connect to the internet
Gigaset Redirect-server
Step 1.
Login at the redirect-server via http://prov.gigaset.net (alternative URL: https://prov.gigaset.net/Editor/#loginPage)
Step 2.
Choose option: Redirection portal
Step 3.
MAC-ID: enter the MAC address and the ID
URL: enter the URL where the device can find the provisioning file. Example : http://xsp.voipit.nl:80/dms/gigasetn/%MACD.xml
Provider: This is an administrative field. You could use this to separate your own customers.
Click on: Register
See screenshot below: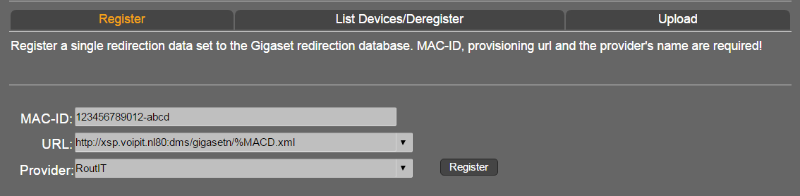
Step 4.
When the device is registered the system will give you a MAC password.
See screenshot below:
Step 5.
Note the MAC and MAC password somewhere for later use.
The device will use MAC as username and MAC password as password for HTTP digest authentication to the RoutIT platform.
RoutIT portal
Step 1.
Login on the portal.
Step 2.
Setup the device as you normally would do and don't forget to use the proper autoprovisioning profile.
Step 3.
Go to a User click on Addresses (right side)
Click on: Configure Identity/Device Profile
Choose Tab "Profile"
Under Authentication Select the radio button: Use Custom Credentials
Step 4.
Enter the MAC password (you got from the redirect-server) in the field: Device Acces Password
Step 5.
Reboot the device.
The device should be autoprovisioned.
Also after a factory reset, the device will be provisioned after booting.